How to Install 3CX v20 on Debian 12 Linux on KVM Cloud
Installing 3CX v20 on Debian 12 system can be a straightforward process when you understand each step. This guide provides details on the commands used during the installation.
Prerequisites
- A clean installation of Debian 12.
- Root access to the system.
- Control to NAT/Forward required Firewall ports
- An active internet connection.
Open a Terminal Session
Access your Debian 12 cloud instance or VPC or VPS and open the terminal. This can usually be done by searching for ‘Terminal’ in your applications menu.
Gain Root Privileges
If not logged in as the root user, switch to the root user by executing:
SSH Config
sudo -iEnter your password when prompted.
Root is the default administrator account on Linux that has full system privileges. Use sudo -i to switch to the root user, which allows you to execute commands with administrative privileges. Enter your regular user’s password when prompted.
Update Your System
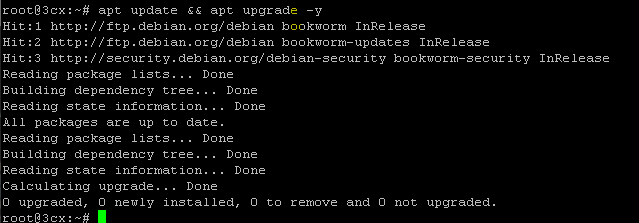
Ensure that your system is up to date with the latest packages and security updates:
SSH Config
apt update && apt upgrade -yConfirm any prompts that come up during the upgrade process.

If you’re asked about keeping or replacing configuration files, choose according to your requirements (usually keeping the current version is safe if you have made custom configurations).
Updating the system ensures you have the latest security patches and software updates.
apt update: Refreshes the list of available packages and their versions, but it does not install or upgrade any packages.apt upgrade -y: Upgrades all updatable packages to the latest version. The-yflag automatically confirms the installation of packages.
Install Required Packages for 3CX v20

Install some prerequisite packages with the following command:
SSH Config
apt install sudo wget gnupg2 dphys-swapfileSome packages are necessary for 3CX to run or to perform the installation.
sudo: Allows a permitted user to execute a command as the superuser.wget: A utility for non-interactive download of files from the web.gnupg2: GNU Privacy Guard is a replacement for the original PGP cryptographic software, allows encrypting and signing data and communications.dphys-swapfile: A swap file manager which sets up a swap space if there is none.
Add the 3CX v20 Repository

To add the GPG key for the 3CX repository to your system, use:
SSH Config
wget -O- https://repo.3cx.com/key.pub | gpg --dearmor | sudo tee /usr/share/keyrings/3cx-archive-keyring.gpg > /dev/null
Add the 3CX repository to your APT sources:
SSH Config
echo "deb [arch=amd64 by-hash=yes signed-by=/usr/share/keyrings/3cx-archive-keyring.gpg] http://repo.3cx.com/3cx bookworm main" | tee /etc/apt/sources.list.d/3cxpbx.list
For the testing repository, if needed, execute:
SSH Config
echo "deb [arch=amd64 by-hash=yes signed-by=/usr/share/keyrings/3cx-archive-keyring.gpg] http://repo.3cx.com/3cx bookworm-testing main" | tee /etc/apt/sources.list.d/3cxpbx.listRepositories are servers which contain sets of software that your system can install.
wget: Retrieves the signing key for the 3CX repository.gpg --dearmor: Converts the downloaded key into a format that APT can understand.tee: Takes the output from the previous command and writes it to a file while also displaying it./usr/share/keyrings/3cx-archive-keyring.gpg: The location where the APT keyring is stored.echo: Prints out its arguments as a string of text.|: A pipe that takes the output from one command and inputs it into another.sudo tee /etc/apt/sources.list.d/3cxpbx.list: Writes the 3CX repository source list to APT’s list of sources.
Update Package Lists Again
After adding new repositories, it’s important to refresh your package lists to make APT aware of the new packages available.
SSH Config
apt updateInstall 3CX v20 Software

Begin the installation of 3CX with:
SSH Config
apt install 3cxpbxAccept the 3CX License Agreement

During the installation, you will be prompted to accept the 3CX License Agreement. Read the agreement carefully, and if you agree to the terms, continue with the installation.
Configure 3CX v20
Upon completion of the installation, you will be presented with options to configure 3CX. You can choose to run the configuration tool from a web browser or the command line.
- Choosing (1) will allow you to configure 3CX via a web interface.
- Choosing (2) will allow you to configure 3CX from the command line.

If choosing (1), you’ll be provided with a URL to access the configuration tool from a browser. It’s important to use the correct IP address that corresponds to your machine’s network setup. (ensure that you replace the local IP with your public IP if you are setting this up on a cloud machine).
SSH Config
http://YOUR_SERVER_IP:5015/Access the URL from your browser and follow the instructions to complete the 3CX configuration.